
Labels and Selectors
How Kubernetes finds things.
Imagine hundreds of pods. How does a service know which pods belong to your shop, and which to your blog? The answer is the simplest, and most important, idea in Kubernetes, labels. In this lesson, you will learn to tag objects, and to find them again.
- Labels are tags on objects
- Selectors find objects by tag
- Almost everything uses them
What labels are
A label is a key and value pair, attached to an object. For example, app equals shop, or tier equals frontend, or environment equals production. You choose the names. Labels do not change how a pod runs. Their job is to group things. Kubernetes objects use them to find each other. Services find their pods by label, and deployments find their pods by label. Annotations are similar, but they hold extra notes for tools, and they cannot be used to select.
Selecting by label
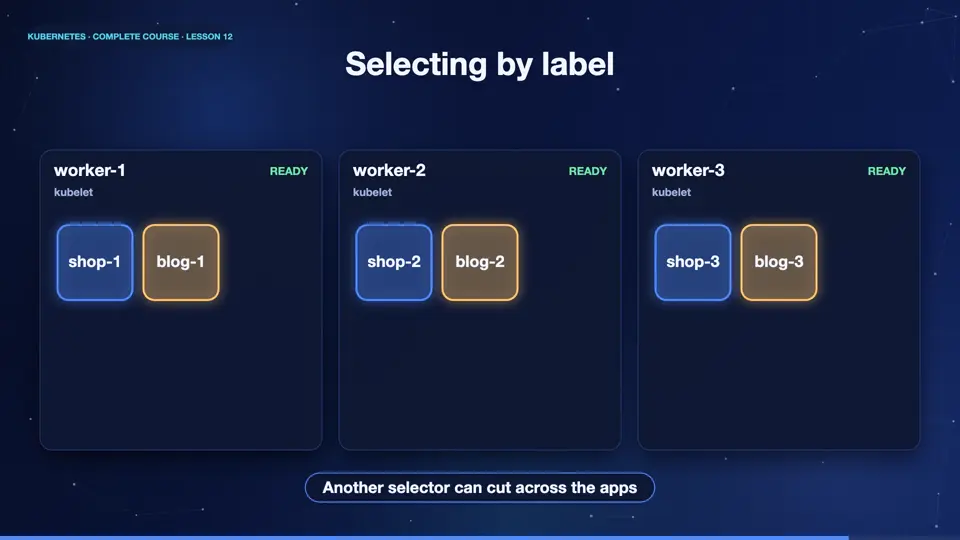
Here are six pods, on three nodes. Three belong to the shop, and three to the blog. A selector is a question about labels. Ask for app equals shop, and exactly three pods answer, wherever they are, on any node. Ask for tier equals frontend, and a different group answers, that cuts across both apps. Labels are flexible tags, and selectors are searches over them.
Labels in action
Let's try it. We create three pods, giving each some labels, with the labels flag. Then we ask kube control to show the labels. Now we select. Dash l app equals shop, returns the two shop pods. Dash l tier equals frontend, returns the frontend pods, from both apps. And we can combine conditions with a comma, meaning and. Selecting by label is how you work with groups, in every command.
kubectl run p1 --image=nginx:1.27 --labels=app=shop,tier=frontend
pod/p1 created
kubectl run p2 --image=nginx:1.27 --labels=app=shop,tier=backend
pod/p2 created
kubectl run p3 --image=nginx:1.27 --labels=app=blog,tier=frontend
pod/p3 created
kubectl get pods --show-labels
NAME   READY   STATUS    RESTARTS   AGE   LABELS
p1     1/1     Running   0          15s   app=shop,tier=frontend
p2     1/1     Running   0          15s   app=shop,tier=backend
p3     1/1     Running   0          15s   app=blog,tier=frontend
kubectl get pods -l app=shop
NAME   READY   STATUS    RESTARTS   AGE
p1     1/1     Running   0          15s
p2     1/1     Running   0          15s
kubectl get pods -l tier=frontend
NAME   READY   STATUS    RESTARTS   AGE
p1     1/1     Running   0          15s
p3     1/1     Running   0          15s
kubectl get pods -l app=shop,tier=backend
NAME   READY   STATUS    RESTARTS   AGE
p2     1/1     Running   0          15s
Summary
Good. Labels are tags, selectors are searches, and Kubernetes uses them everywhere to connect objects. Annotations carry extra notes. In the next clip, we meet the objects that actually keep pods alive and organised, namespaces, replica sets, and deployments.
Key takeaways- Labels: key=value tags
- Selectors find groups of objects
- Annotations: notes, not selection