
Kustomize
Customising without templates.
Helm uses templates. Kustomize takes a different path. You keep plain, valid Y A M L, and describe the changes on top. It is built into kube control, so there is nothing extra to install. In this lesson, you will build one base, and customise it for production.
- Plain YAML, no placeholders
- Describe changes as layers
- Built into kubectl
Bases and overlays
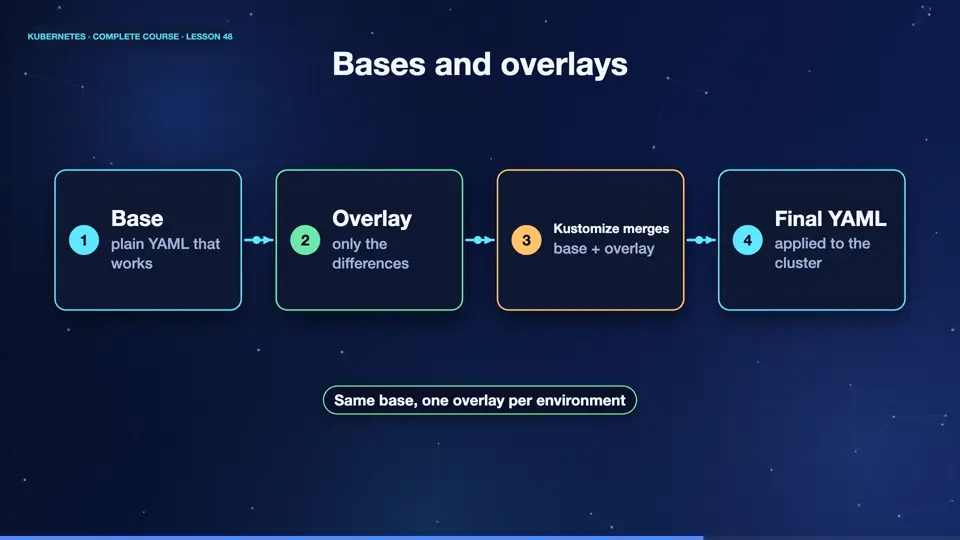
The idea is two layers. The base is your ordinary, complete set of files. It works by itself. An overlay sits on top, and describes what is different for one environment. For production, add a name prefix, three replicas, and a newer image. Kustomize merges them, and produces the final Y A M L. You can have one overlay for each environment, dev, staging, and production, all sharing the same base.
- Baseplain YAML that works
- Overlayonly the differences
- Kustomize mergesbase + overlay
- Final YAMLapplied to the cluster
A production overlay
This is the production overlay. It starts by pointing at the base. Then it adds a name prefix, prod dash, to every object. The replicas section says, the deployment called web, should have three replicas. And the images section changes the engine X tag, to one point twenty seven. No templates, no placeholders. Just a short list of the changes.
resources:
- ../../base
namePrefix: prod-
replicas:
- name: web
  count: 3
images:
- name: nginx
  newTag: "1.27"
Preview and apply
Let's try it. The kustomize command renders the result, without applying anything. We see that the deployment is now called prod dash web, with three replicas, and the newer image. Then, apply with dash k, applies the whole result at once. The cluster has three pods, from the production variant, with no copy of the base files edited. You can switch between helm and kustomize freely, many teams even use both.
kubectl kustomize overlays/prod | head -14
apiVersion: apps/v1
kind: Deployment
metadata:
  name: prod-web
spec:
  replicas: 3
  selector:
    matchLabels:
      app: web
  template:
    metadata:
      labels:
        app: web
    spec:
kubectl apply -k overlays/prod
deployment.apps/prod-web created
kubectl get deployment prod-web
NAME       READY   UP-TO-DATE   AVAILABLE   AGE
prod-web   3/3     3            3           15s
File used: base/deployment.yaml
apiVersion: apps/v1
kind: Deployment
metadata:
  name: web
spec:
  replicas: 1
  selector:
    matchLabels:
      app: web
  template:
    metadata:
      labels:
        app: web
    spec:
      containers:
      - name: web
        image: nginx:1.25
File used: base/kustomization.yaml
resources:
- deployment.yaml
File used: overlays/prod/kustomization.yaml
resources:
- ../../base
namePrefix: prod-
replicas:
- name: web
  count: 3
images:
- name: nginx
newTag: "1.27"Helm or Kustomize?
Which one should you use? Helm is best for distributing software to many people, with versions, and for installing third party applications. It has releases, upgrades, and rollbacks built in. Kustomize is best for your own manifests, across a few environments, when you like plain Y A M L. Neither is wrong. Many teams install third party software with Helm, and manage their own apps with Kustomize.
| Tool | Strength | Best for |
|---|---|---|
| Helm | templates, releases, rollback | third-party apps, sharing |
| Kustomize | plain YAML, overlays | your own apps, environments |
Summary
Excellent. Kustomize customises plain Y A M L with bases and overlays. Together with Helm, you can package, share, and configure any application. Next, we turn to the skill that separates experts from beginners, debugging.
Key takeaways- Kustomize: base + overlay
- kubectl apply -k
- Helm for sharing, Kustomize for yours