In this article, you’ll see face detection using OpenCV in Python. You have to follow these steps to detect faces. I highly recommend you get the “Computer Vision: Models, Learning, and Inference Book” to learn Computer Vision.
Step 1: Import Libraries
Import the required Libraries.
import numpy as np
import cv2
Step 2: Read an Image
Read an image from the location. In my case, “C:\\Users\\engrh\\Projects” is the location and “face.jpg” is the name of the image.
img = cv2.imread("C:\\Users\\engrh\\Projects\\face.jpg")Step 3: Convert image into grayscale
Convert the above image into grayscale. The OpenCV library reads the image into BGR format, so converts it into grayscale using the cv2.Color() function.
gray = cv2.cvtColor(img, cv2.COLOR_BGR2GRAY)
Step 4: Haarcascade Model
Now download the Haarcascade_frontalface_default.xml file from the following link: https://github.com/opencv/opencv/blob/master/data/haarcascades/haarcascade_frontalface_default.xml
This is the trainned model to detect faces. It is trainned on many images. We can use this model to detect faces in images and videos.
Step 5: Download xml file
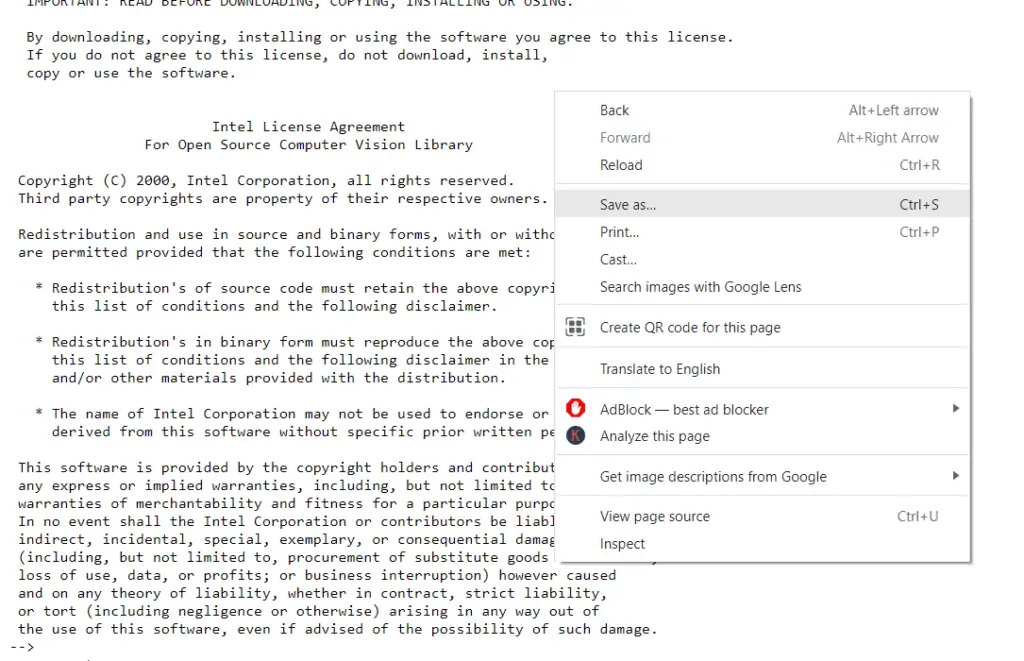
To download the above file, left click on “Raw” and save this file using right click. You can see this step in the following figures. In the next step, we will use this xml file.


Step 6: Read the xml file and set the arguments
Now read the above file and store it in the variable. In the following code, 1.3 is the scaleFactor and 5 is the minNeighbors argument.
face_detector = cv2.CascadeClassifier("C:\\Users\\engrh\\Projects\\haarcascade_frontalface_default.xml")
faces = face_detector.detectMultiScale(gray, 1.3, 5)
Step 7: Face Detection
Now draw a red rectangle on the face. 3 is the thickness of the rectangle. (x,y) is the top left corner and (x+w, y+h) is the bottom right corner of the rectangle. The following code will also show the output image.
print(faces)
for (x,y,w,h) in faces:
    cv2.rectangle(img, (x,y), (x+w,y+h), (0,0,255), 3)

    cv2.imshow('Face Detection', img)
    cv2.waitKey(0)
cv2.destroyAllWindows()
Output:

Step 8: (Optional)
This step is useful if you want to save the output image.
cv2.imwrite("C:\\Users\\engrh\\Projects\\face_detection.png", img)Face Detection using WebCam
You can use your camera to detect faces in real time. If you are using your laptop camera, then write cv2.VideoCapture(0) or, in the case of an external camera, use cv2.VideoCapture(1).
# Import the required libraries
import numpy as np
import cv2

# Read the xml file
face_detector = cv2.CascadeClassifier("C:\\Users\\engrh\\Projects\\haarcascade_frontalface_default.xml")
frame = cv2.VideoCapture(0)
frame.set(3,640) # Width
frame.set(4,480) # Height

while True:
    ret, image = frame.read()
    gray = cv2.cvtColor(image, cv2.COLOR_BGR2GRAY)
    faces = face_detector.detectMultiScale(gray, 1.3, 5)
    # Draw the rectangle on faces
    for (x,y,w,h) in faces:
        cv2.rectangle(image,(x,y),(x+w,y+h),(255,0,0),2)
        roi_gray = gray[y:y+h, x:x+w]
        roi_color = image[y:y+h, x:x+w]

    # Display the Video
    cv2.imshow('Face_Detection',image)
    k = cv2.waitKey(30) & 0xff
    if k == 27: # press 'ESC' to quit
        break

frame.release()
cv2.destroyAllWindows()

